
Go Blue with Indigo - setting up your Indigo dye vat.
- Christopher

- Mar 23, 2023
- 4 min read
We thought we would share our experience with using our very own indigo dye kit which contains 100% natural indigo, plus the oxygen reducer thiox (thiourea dioxide), and soda ash as the alkaline base. Although we supply an excellent natural 1-2-3 method kit containing fructose as the antioxidant, and lime (calcium hydroxide) as the alkaline, the method that gives the most standardised results in our opinion, is the thiox/soda ash method.
Our kit contains the indigo (50g), thiox (50g), and soda ash (100g) plus a detailed instruction booklet (it is proportions of 1,2,3 of these ingredients). In addition to the kit, you will need a cylindrical vat ideally with a lid to keep oxygen our, and one which has a total volume of between 15-25 litres. This will mean you can dye up to 500g fibre/fabric/yarn in one dyeing session before needing to re-charge, and tend to the vat. You can of course set up much smaller vats but remember the proportions 1,2,3. We use a stainless steel cylindrical vat like the one in the following photo (but equally you could get hold of a plastic container with a lid - a plastic brewers bucket or a large saucepan with a lid would also work). However, keep any container just for dyeing - don't use it for food preparation afterwards.

Once you have selected your vat, place it on a solid and stable surface, preferably one that can be easily cleaned, as you will inevitably drip dye liquor on the surface when dyeing. When first setting up your vat, fill your vat to approximately 3/4 full with warm to hot water as per the following picture.

Gather together your instruction booklet and indigo dye kit from Wonky Weaver. You will also ideally need a long wooden spoon, some rubber gloves, scales/weighing spoon, and either pH strips or a pH meter for checking the pH of the vat. The pH is important as you need a pH around 9-10 when dyeing wool, and a more alkaline pH of around 11 when dyeing cotton or other plant fibres. The pH is adjusted using soda ash (sodium carbonate).
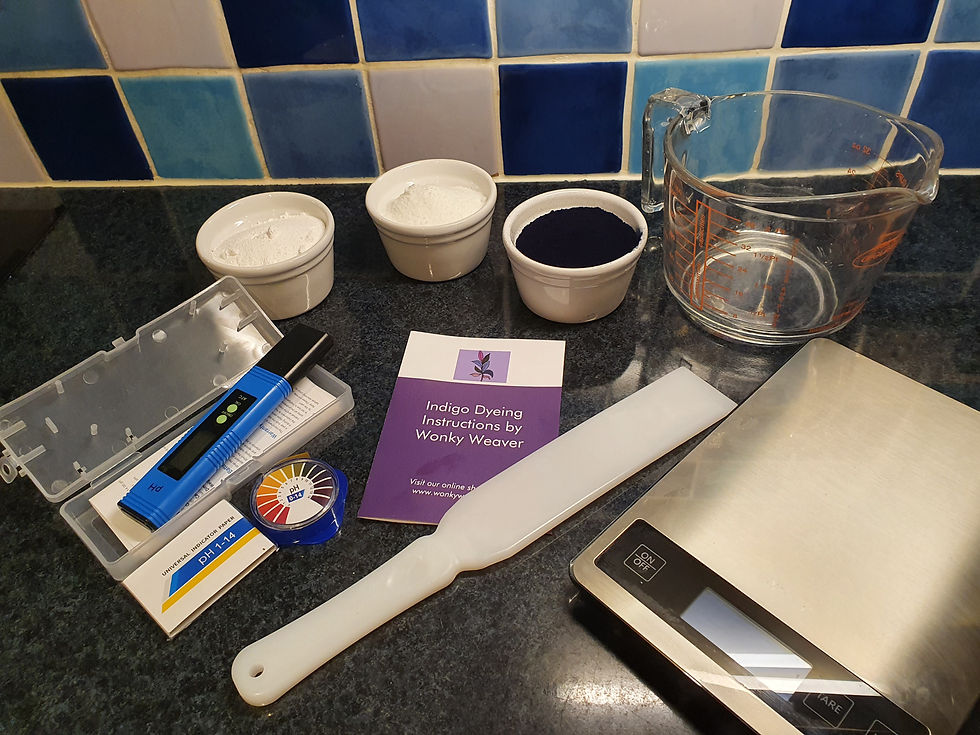
Weigh out the correct amounts of indigo, thiox and soda ash and mix each separately into hot water (to form liquid pastes of each) and add to the vat following the instructions and using the proportions as given in the instruction booklet. Leave the dye vat to settle for at least 15 minutes (but we usually leave for at least 2 hours). The dye vat liquor should be a yellow/green transparent liquid.

When you are ready to start dyeing, make sure your items of fabric or yarn, are scoured and washed to remove any dirt/debris and also wetted. Make sure any excess water is rung out so not to introduce too much water/drippage into the vat. Dripping excess water into the vat introduces oxygen which you don't want. The purpose of the thiox is to deoxygenate the vat so that the indigo is reduced, and the pigment indigotin released.
Put on gloves, and gently lower your fibre into the vat, and then do a very gentle scrunching motion under the vat liquor to ensure the fibre is exposed/coated to the dye in the vat. Don't over agitate or swirl, as this will add unwanted excess of oxygen/air into the vat, and don't over load your vat with too much yarn/fibre. We usually leave for 5 minutes before gently lifting the fibre out of the vat. At this point the fibre should look yellowy/green (not blue!) as per the following photo.

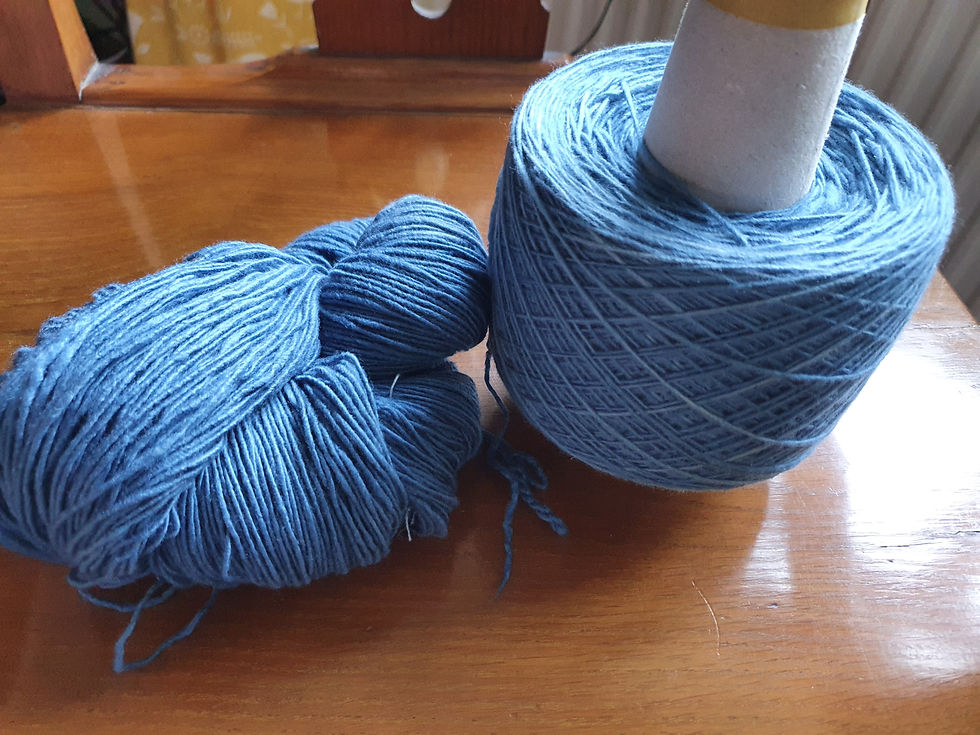
As you will quickly see on exposure to the air, the fibre will start to turn blue. In the following photo, you will see the yarn on the right has been exposed for a couple of minutes, and the yarn on the left was just lifted out of the indigo vat.

When done with dipping, hang on a clothes rack, or line or something similar to allow the fibre to be fully exposed to the air as follows.

Once the fibre is fully exposed to the air you may want to go for darker indigo shades. To achieve this, you can re-dip the fibre into your indigo dye vat, repeating the same steps as above (gently dipping and leaving for 5 minutes and then re-exposing to the air). This can be repeated several times if so desired. Once you are happy with the colour shade, leave to fully expose to the air - for at least a couple of hours minimum, then rinse, wash and dry. You may opt to use our dye fixative wash on the last rinse as this can help wash, and wet fastness, and prevent future loss of the indigo on contact with the skin.
If you want to get even more creative you can overdue with indigo. So first dye your fibre with myrobalan and then over dye with indigo to achieve teal colours. If you first dye with madder and then over dye with indigo you can yield purple/mauve shades. The possibilities are endless :-)
Please do let us know how you get on with our dye kits or any of our products, and say hello if you have any questions for us! Enjoy your time exploring indigo!
Visit our website www.wonkyweaver.com and click on Indigo to see our range of products and dye vat reagents.

Comments